| AudiAnnotate Home | Workshop Information |
Getting Started: Workflow Documentation and Demonstration Videos
- AudiAnnotate Overview
- Part 1: Creating a Project
- Part 2: Exporting for Preservation and Publication
- Part 3: Collaborative Project Scenarios
- Appendix
- Demonstration Videos
AudiAnnotate Overview
The AudiAnnotate application (AA) uses GitHub to access data and build project repositories. It does not store data, but rather, allows you to interact easily with data in GitHub. To do this, AA creates a IIIF manifest that is stored in GitHub. This manifest includes the information you will provide when you build your project, upload a URL to an audiovisual item and associated metadata, and add annotation layers.
Part 1: Creating a Project
The instructions below will guide you through building a project with the AA. For further instructions on creating annotations or creating an audio URL, please refer to our supplemental documentation here.
Creating a Project
- You will need to have a GitHub account. To create an account on GitHub:
- Navigate to GitHub.
- You will provide a username, email address, and password to create your GitHub account.
- Navigate to the AudiAnnotate Application (AA).
- You will be prompted to log in through GitHub. (Make sure to allow the app to authorize AA. This means that AA will be allowed to manage and write files on your behalf. )
- Enter your GitHub password to log in.
- Select “New Project.” On this page, you will add the metadata to allow AA to generate your project. AA creates a repository or “repo” in GitHub, which is your project’s storage space for any files related to your project.
- Add a “Title.” This is the project name, and the name of the GitHub repository that will be generated in this process. This title will also appear as the project name on the AA site under “My Projects.”
- Add a description of your project.
- Add a project slug. This becomes the GitHub repository url. Note, spaces are not recognized. Please use hyphens instead of spaces.
4. Select “Create Project.”This contacts GitHub and generates the repository. Now you have created an AudiAnnotate project, with all information stored in a GitHub repository. The next step will be to build the IIIF Manifest, which allows you to associate audiovisual material and annotations with your project.
Adding an Audiovisual Item
5. On the Audio Files page, select “Create Item Manifest.” This creates a new item in the IIIF manifest associated with your project. This is where you will add metadata for your audiovisual material.
-
Add a label for your audiovisual file. The label refers to the title of the audiovisual material to which you will be providing a URL and should be human-readable.
-
Add “Audio File URL.” This is the direct link to the audiovisual file.If you need to create a link, see our Supplemental Documentation below.
-
Add the duration of your audiovisual file. Duration can be input in minutes:seconds or hours:minutes:seconds.
-
Item Homepage URL is the item page where the audiovisual material was retrieved. This, and the fields below, will add provenance metadata to the IIIF manifest.
-
Provider name is the organization that made the recording available.
-
Provider URL is a link to the organization that made this audiovisual material available.
6. Once metadata has been added, select “Save” to save reference and metadata to this item in the IIF manifest.
Adding Annotations
If you are continuing from step 6 above
Now, you’re on the annotations page, where you can manage your project’s annotations. Annotations are uploaded to AudiAnnotate via .tsv file(s). Each .tsv file uploaded to your AudiAnnotate project is one annotation layer. Your resulting project page may present one or more annotation layers.
7. Select “Choose file.” Choose the .tsv (or .txt from Audacity) that you would like to add to your project.
8. Select “Add” at the bottom of the page. This will generate your annotations and align them in the IIIF manifest with the audiovisual file.
9. On the next screen, you will configure your file so the application knows how to read each column.
- Under “Row Header,” uncheck the check box if the first row is not your column titles/header
- Under “Column Configuration” use the dropdowns to select the appropriate label for each column that corresponds to start time, end time, and annotation
- If your file contains an additional column with a layer label, select “yes” on the dropdown under “Layer Configuration” and select the appropriate column. If your file does not have a column for layer label, select “no” in the dropdown. You will then be prompted to name your layer in the field “Annotation Layer Label.”
10. You may now add additional annotation layers to the same audiovisual item by repeating steps 7 through 9.
If you are accessing an existing project to add annotations:
- Sign in to AudiAnnotate.
- Select “My Projects” in the upper right corner.
- Select “Edit” on the tile that corresponds to the project to which you would like to add annotations.
- Select the title of the audiovisual file to which you would like to associate annotations.
- Follow steps above to add annotations.
Importing an Existing IIIF Manifest
- Log into AudiAnnotate and select “New Project” and follow the steps above. You can also navigate to an existing project tile and select “Edit.”
- Select “Import Existing Manifest”.
- Here, you can include an external item in your manifest by providing a manifest URL. Paste the URL into the field, then select “Save.”
Part 2: Exporting for Preservation and Publication
Because AudiAnnotate project sites are built using Jekyll, a static site generator, you can export them from Github and preserve or publish elsewhere.
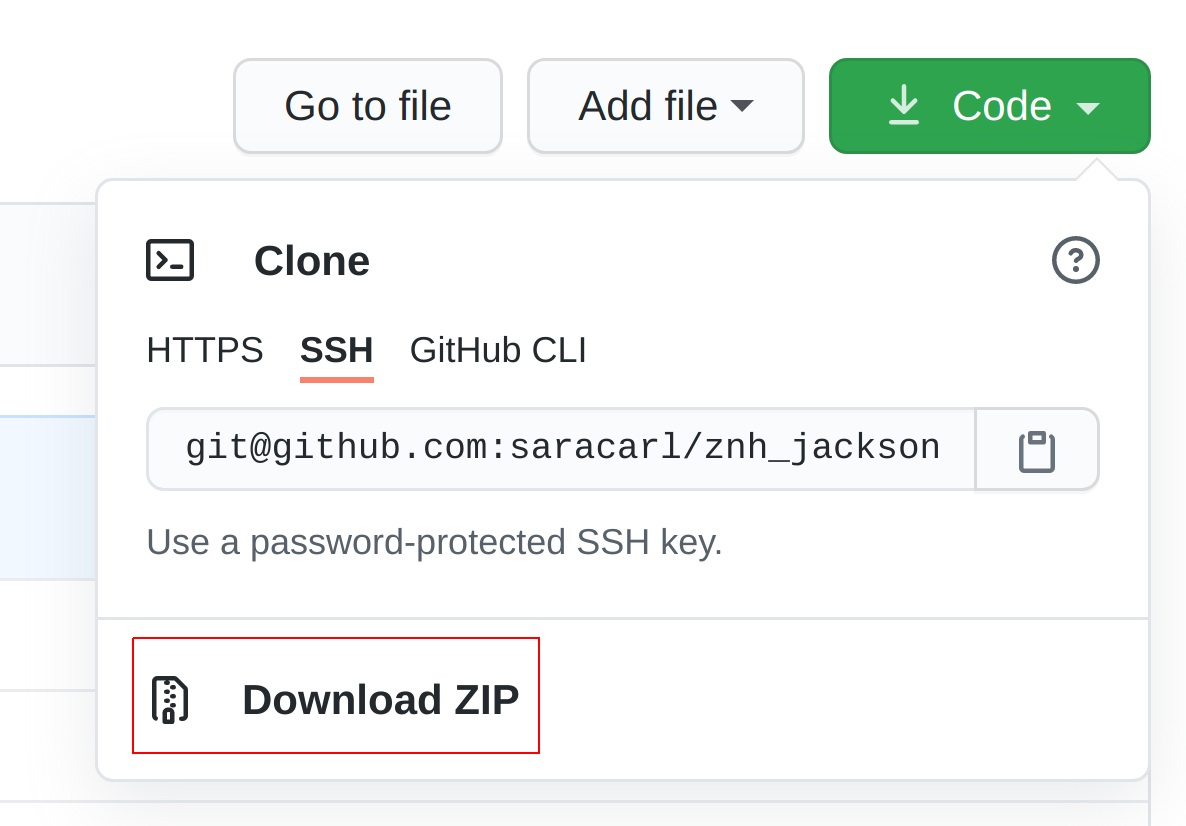
To export from Github, go to the repository page and look for the green “Code” button. Select “Download ZIP”:
Using the Export for Preservation
- Unzip the file from the previous step. In the top level directory run “jekyll build”. This generates the static web pages as html files. Jekyll build does not create the correct filenames for IIIF manifests, so each directory within the generated site will have a manifest.json.html file instead of the correct manifest.json file.
- Rename the files to remove the .html extension, which will allow the A/V player to work (provided that the media is still available).
- Zip up the directory again, and place it in your preservation system.
Using the Export for Publication Elsewhere
You can serve a Jekyll site on a variety of web hosts or your own web server. This list is a good starting point, or contact the IT staff at your institution for other options.
Part 3: Collaborative Project Scenarios
Using Hypothesis to Annotate an AudiAnnotate Project
Hypothesis is “a conversation layer over the entire web that works everywhere, without needing implementation by any underlying site.” Integrating Hypothesis with an AudiAnnotate project allows for a layer of commentary on top of AudiAnnotate annotations from multiple contributors. When annotating with Hypothesis, you can annotate in a group, individually, privately, or publicly.
Creating a Hypothesis account
- Navigate to Hypothesis.
- Select “Create a Free Account” and follow the prompts.
- You’ll also need to follow these instructions to install the chrome extension or bookmarklet.
Creating a group on Hypothesis
- Navigate to Hypothesis and select “Log in”.
- On your profile page, select the dropdown arrow next to “Groups.”
- Select “Create new group” and name your group.
- From the group page, you can now share the invitation link to invite others to annotate in your group.
Annotating with Hypothesis
-
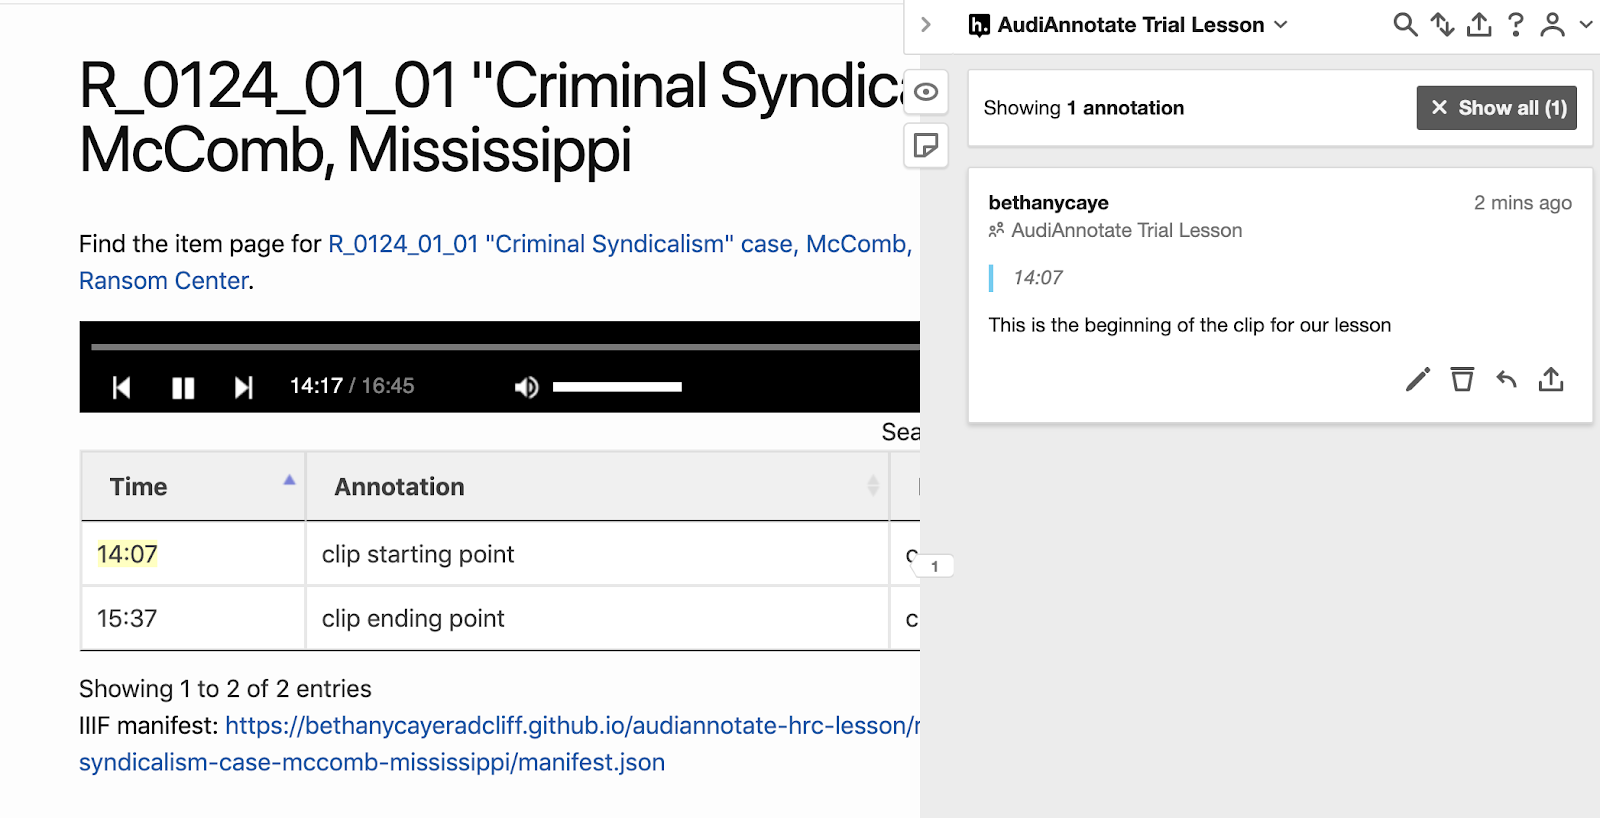
Navigate to your AudiAnnotate project page. (This is an example GitHub Pages project page.)
-
Select the Hypothesis bookmarklet.

3. Select the arrow on the right side of your screen to expand your view.

4. If you do not see the group, select log in at the upper right of the window.
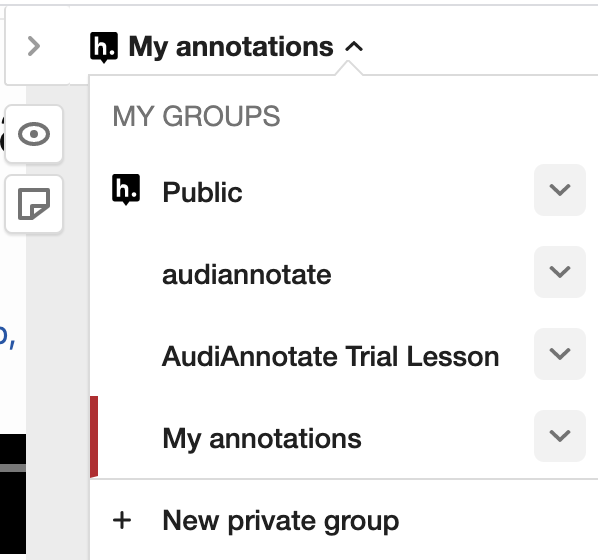
5. Select the dropdown arrow next to “My Annotations,” and select your group.
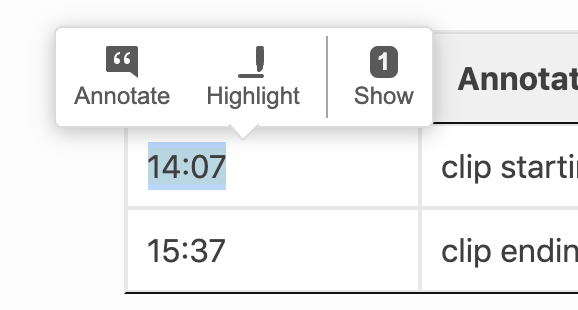
6. Next, highlight text on the page you would like to annotate. A small bubble will pop-up that invites you to annotate or highlight. Select “annotate.”
7. In the window on the right, you can add an annotation:
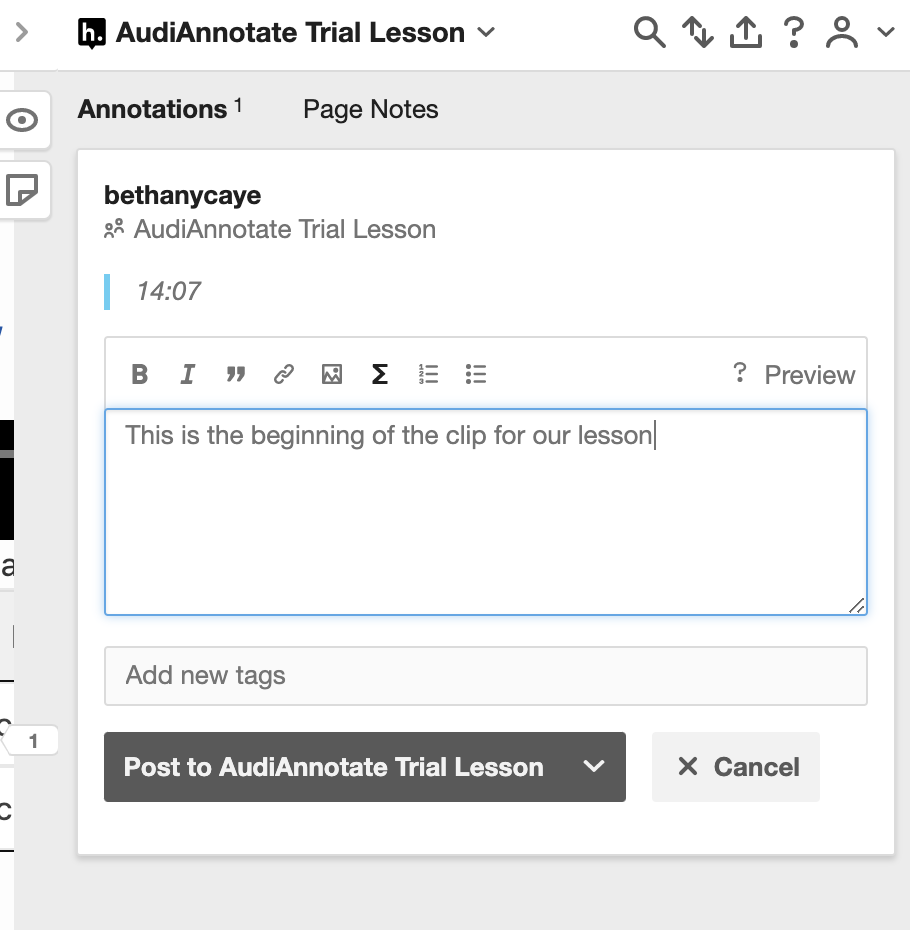
8. Select “Post to [Group Name]”; when you hover and select on the place you annotated, you can view the annotation in the right sidebar
9. You can also add tags in the field that says “add new tags,” by typing in text and selecting the enter key.
Advanced AudiAnnotate Collaborative Project Scenarios
The scenarios below require some familiarity with GitHub, but the instructions will guide you through initial setup of your collaborative projects. There are two methods of collaborative projects. The simplest method is the Shared Repository, where one user creates an AudiAnnotate project and additional users are manually invited to that project by the initial user. The Fork and Pull method is a bit more complex, and involves one user creating a repository and additional collaborators making a copy of that repository using GitHub’s fork (i.e., copy) feature, making changes, and making pull requests which can then be merged into the original repository after being reviewed and approved by the repository owner.
Method 1: Shared Project/Repository
Creating a shared project
To create a shared repository (i.e., project), first follow the above steps (under “Creating a Project”) to create a project in AudiAnnotate. Once you have created an AudiAnnotate project, you will need to give collaborators access to the generated repository. Even if collaborators have not set up a GitHub account yet, you can invite them to the shared project using their email address, which will prompt them to create an account. To do so:
- Navigate to GitHub.
- From your profile, select “Your Repositories.”
- Select the repository to which you would like to invite others.
- Select Settings>Manage Access> Invite a Collaborator
- Here, you can add collaborators by email or existing username. Note that email invites expire after 7 days. If you add them by email and they do not have an account, the invite will prompt them to create one.
- Once collaborators have access to the repository, they will be able to add annotations to the project through the AudiAnnotate application.
Method 2: Fork and Pull
Project Creation and Sharing for Initial User
- Follow the instructions under [“Creating a Project”]() above.
- Follow the instructions to add audiovisual items and upload any annotations according to the steps above.
- Navigate to GitHub.
- From your profile, select “Your Repositories.”
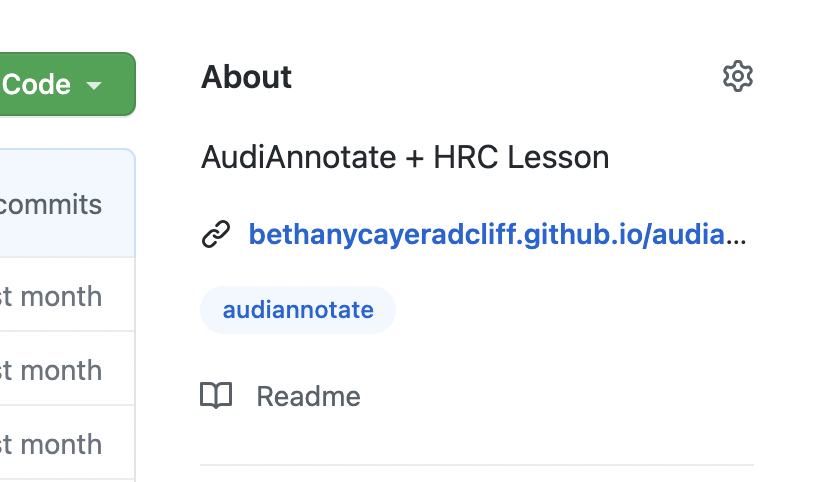
- Select on the repository that will be used to collaborate with other users, and copy the link to that repository. Note here that on the right side of the page under “About,” there is a tag that says “audiannotate” (see below). This tag will be added manually by collaborators in a later step.
6. This link can now be shared with other users.
Access Instructions for Collaborators
- Navigate to the repository link provided by the initial user.
- Look for the button in the upper right corner of the repository that says “Fork.”
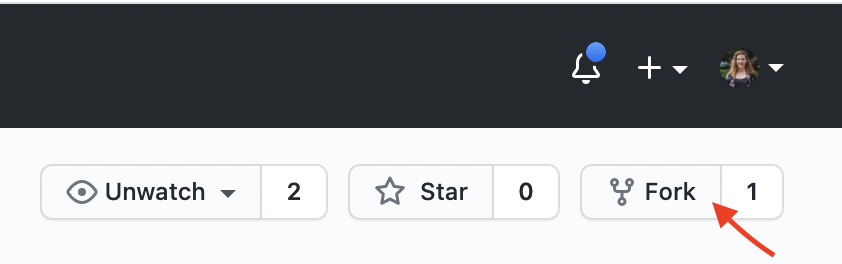
- Select Fork and the account to which you would like to copy the repository. Now you have an exact copy of the original repository.
- Because this repository is no longer associated with AudiAnnotate, you will need to manually add this back so that AudiAnnotate knows to manage this repository as well as the original. Select the gear icon next to “About” on the repository page.
- Once you select the gear, you’ll see a window that looks like this:
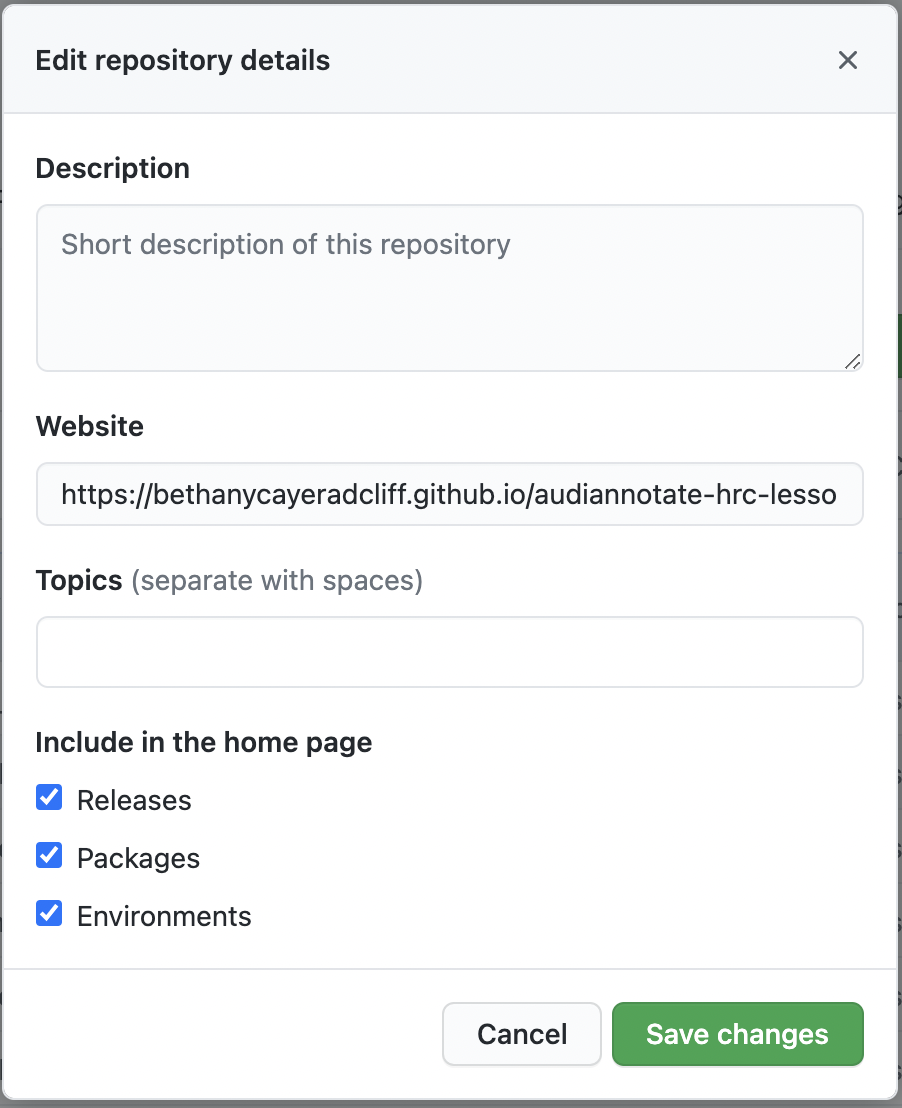
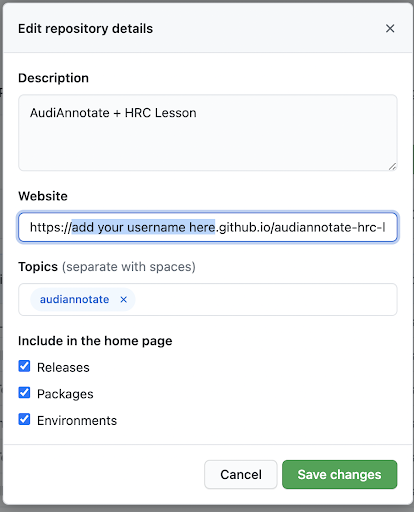
- The “Website” reflects the URL details of the original project. You will want to change the username portion of the URL to your username (between https:// and .github.io).
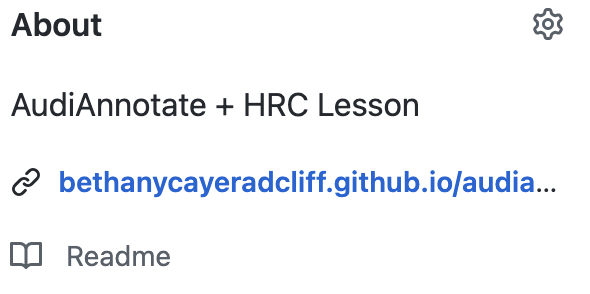
- Notice that there are no topics associated with this project. You will need to associate the project with AudiAnnotate manually. Type “audiannotate” in the box and select enter. This tag tells GitHub that your repository is an AudiAnnotate project. It will look something like this:
8. Select “Save changes.”
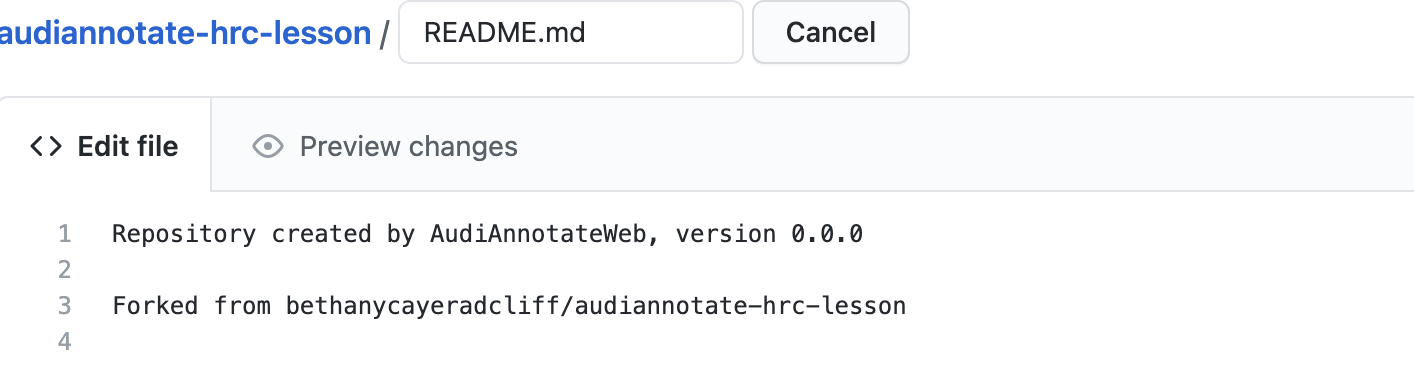
9. When you make a project in AudiAnnotate, a GitHub repository is created, along with a website that corresponds to it. When you fork a project, a website is not automatically created, so you will have to force GitHub to do this. The simplest way to do this is to edit the README file.
10. On the repository page, scroll to the bottom and select README.md and select the pencil icon to edit.

11. Add some text to the readme. We suggest text that shares the origins of the repository, something like: “Forked from [username of original user]/[repository name].” This text will display on the AudiAnnotate site project tile to signal that this is a forked repository.
12. Select “Commit changes” at the bottom of the page.
13. Wait a minute, then check the link you just edited under “About.” You should see a site at that link.
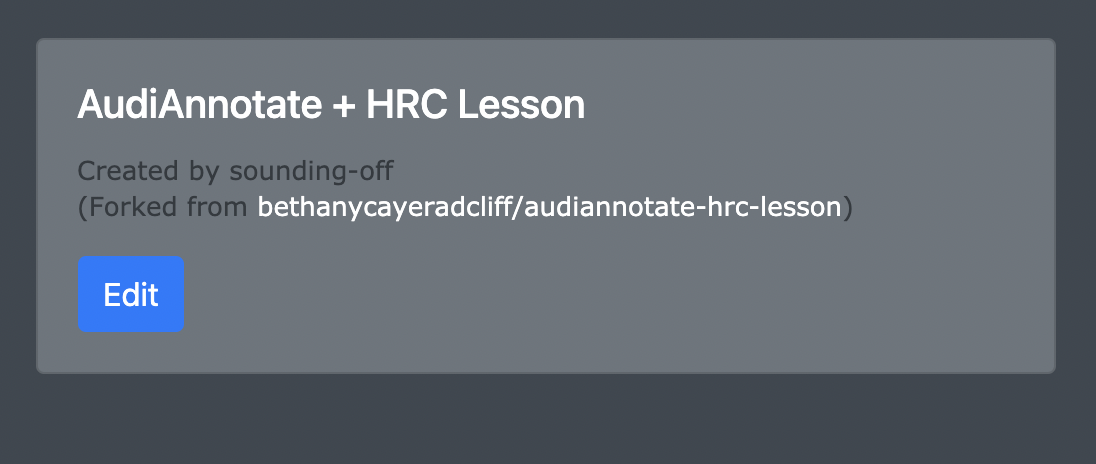
14. Now navigate back to AudiAnnotate and sign in. You should now see the forked project tile with the note you added to the README.md file.
Making changes to the project
Changes are made by collaborators on their copy of the original repository (created in the steps above). This means that any changes, committed to the original repository and hence reflected on the AudiAnnotate project, will have to be approved by the original user and merged into the project. The below instructions will share how to do this.
For collaborators
- Log in to AudiAnnotate and locate the project tile of the forked repository. You will see a tile for the collaborative repository you made in the above steps. The text added to the README.md file will be visible on the tile. Select “Edit.”
- Make changes! Follow steps above to add an audiovisual item or to add annotations to an existing item.
- After making changes, it is time to merge the changes you made in your repository copy with the original project. To do this, return to the repository page on GitHub. (You can navigate to your repository page using the dropdown in the top right corner once you log in, and selecting the repository.)
- Select the button that says “Pull Request.” (You can also use the “Compare” button to compare changes before merging.)

- Select “Pull request” and then “Create Pull Request.” Here you can add a note about what you changed (i.e. “added additional field recording found at the Library of Congress site”) and then select “Create Pull Request” again. This does not actually make a change to the repository. It sends a request to the owner of the original project, which they can review before merging.
For the initial user
Once a collaborator has created a pull request from their copied repository requesting a change in the original repository that you own, you will have to review it and merge the changes.
- You should get an email notification that a pull request has been created. This email will link you to the pull request made by the collaborator.
- When you open the pull request, you will see the changes being requested by the collaborator. You can select into the files where changes are being. Additions to each file appear in green with a plus (+) sign at the start of the row, while items being deleted appear in red with a minus (-) sign.
- To accept the changes, you select “Merge pull request.”

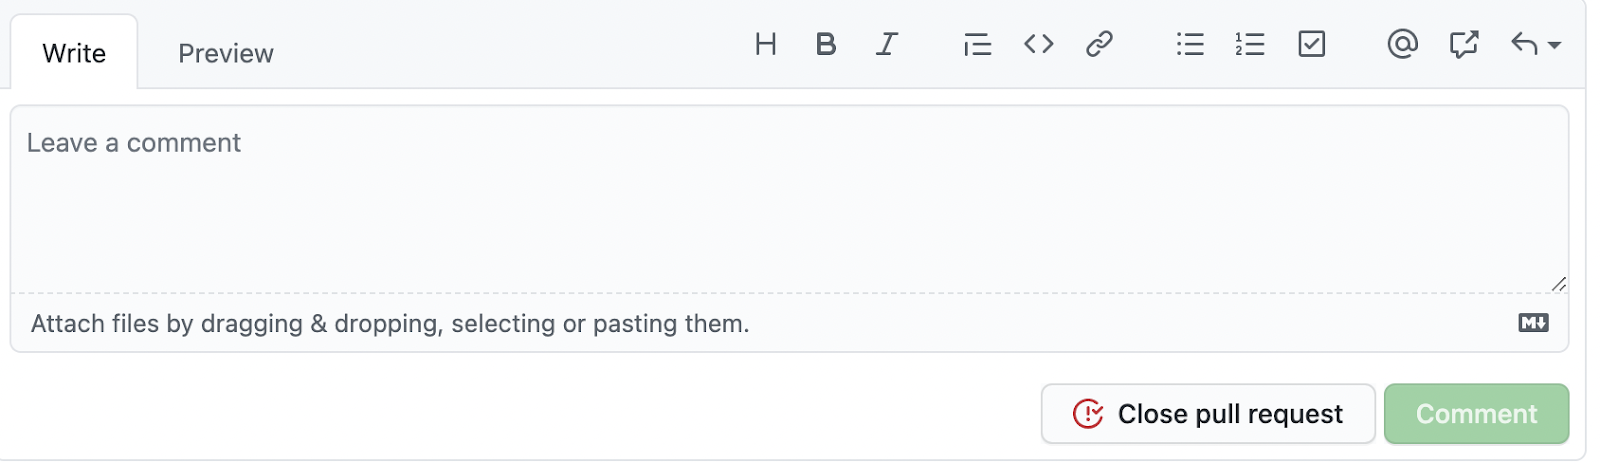
- If you are unsure of changes, or have questions for the collaborator, you can continue a discussion by commenting on the thread.
Appendix
Glossary of Terms
- Project (Example: https://tanyaclement.github.io/znh_jacksonville_1939/)
- Conceptually: A set of related AV materials with contextual information (e.g., front matter, explicatory prose)
- Materially: a GitHub repository that includes collection IIIF manifests, web annotations, and web pages generated by Jekyll that present the project and items
- Items (Example: https://tanyaclement.github.io/znh_jacksonville_1939/t86-243/)
- Conceptually: An annotated audiovisual artifact that can be played online.
- Materially: An item IIIF Manifest with a reference to an audiovisual file; one or more web annotation files; a web page generated by Jekyll for the item; and a Universal Viewer javascript application
- Annotations
- Conceptually: might include metadata or commentary added by a user that provides additional description or explanation of an audiovisual object for a variety of purposes from facilitating access and discovery to teaching and sharing scholarship.
- Materially: A JSON element (that is part of the AnnotationPage, see below) that includes a textual body and a target on the referenced audiovisual file.
- Layer
- Conceptually: A means of organizing annotations by category.
- Materially: One or more WC3 web annotation AnnotationPage file(s) that contains the JSON annotation elements.
AudiAnnotate IIIF Concept Chart
| AudiAnnotate | IIIF | Aviary | Notes | Examples |
|---|---|---|---|---|
| Item | Canvas | File | Could have more than one media file but practically does not; Two media files would be two canvases (see example) on one manifest. | Universal Viewer example |
| One or more file(s) that we annotate. | Manifest | Resource | Must have a Canvas. May contain more than one Canvas. | Three interviews by a single Holocaust survivor. Two sides of one tape. |
| Annotation: Timestamped text commentary on AV | W3C Web Annotation | User-created annotation; index point; transcript | There’s a target and there is a body. | Target might be an audio file timestamp or range; the body could be a media file; commentary; links |
| Annotation Page: A file aggregating annotations of the same layer on the same Canvas. | A W3C-compliant file aggregating annotations, associated with a manifest | SENT example, see video. All the annotations identifying environmental noise for one recording; another annotation page might have technical sounds | ||
| An annotation layer: Aggregate collection of annotation pages in one or across multiple manifests or canvases | W3C annotation collections (bag) | Annotation page type label | Conceptually: A means of organizing annotations by category. Multiple audio files have the same kinds of annotations across them. | Multiple environmental annotation pages associated with multiple Canvases or manifests. |
| Projects, editions, exhibition – multiple Manifests associated with one GitHub repository | Collections: assembly of one or more than one manifest into a IIIF JSON file. | TBD | A set of related AV materials with contextual information (e.g., front matter, explicatory prose | Example AudiAnnotate Project |
| TBD | Structures – an index or a TOC for a single manifest; a structure can span multiple canvases. | An array with a range and a label and a list of items (which also have ranges so can be nested). | IIIF manifest example; Go to Index and “Saturday Review” on this Universal Viewer example |
Supplemental Documentation
Creating Annotations (before using AudiAnnotate)
AudiAnnotate exists as a tool to compile and present annotations. Because of that, you do not create your annotations in AudiAnnotate, but bring your existing annotations to the application. Editing software like Audacity and Adobe Premiere can facilitate the annotation-creation process, but because annotations just need to be uploaded as structured data on a simple tab-separated file, you do not need to use other software if that is not your preference. The instructions below will walk you through annotation creation using Audacity, a simple spreadsheet, and Adobe Premiere.
Note on Audacity Spyware Controversy:
Audacity was recently accused of potentially being spyware, when a new privacy policy mentioned that data may be shared with the company that recently acquired Audacity, WSM Group, that has their headquarters in Russia. Audacity published a statement on GitHub that shares more context on the privacy policy update. The post mentions that Audacity does not sell any 3rd party data, and the shares that data collected at the desktop level includes IP address, OS version and CPU type, and error report data.
Creating Annotations Using Audacity
Downloading Audacity
- If you have a Mac: Navigate to Audacity’s Mac download page. There, you’ll download the .dmg file and double-click to follow instructions for downloading Audacity to your machine. We recommend downloading the latest version.
- If you have a PC: Navigate to Audacity’s PC download page. There, you’ll download the installer and follow instructions for downloading Audacity to your machine. We recommend downloading the latest version.
Annotating in Audacity (Method 1)
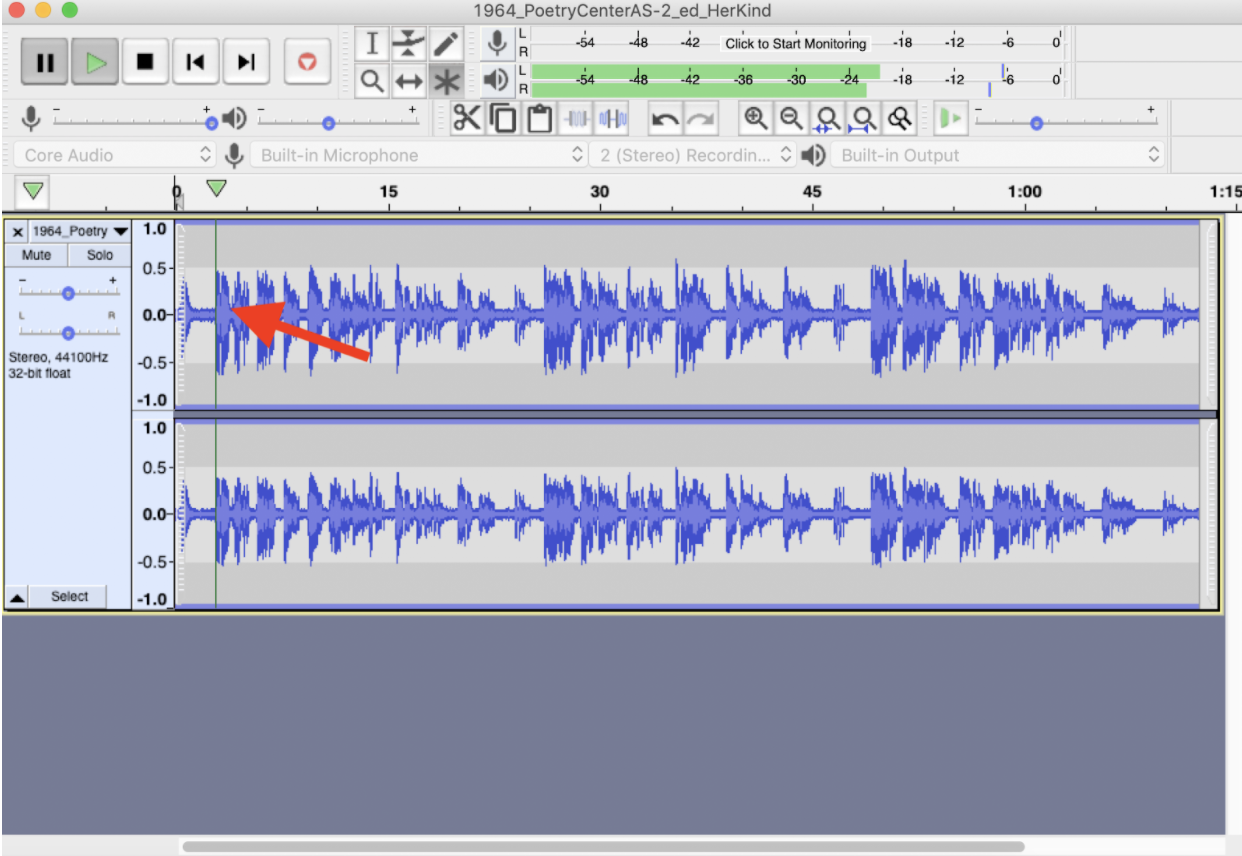
- Open Audacity, and in the top left, navigate to File→ Open, and then select the audio file you will be adding annotations to.
- On the warning screen, make sure the “make a copy” choice is selected, then select ok.
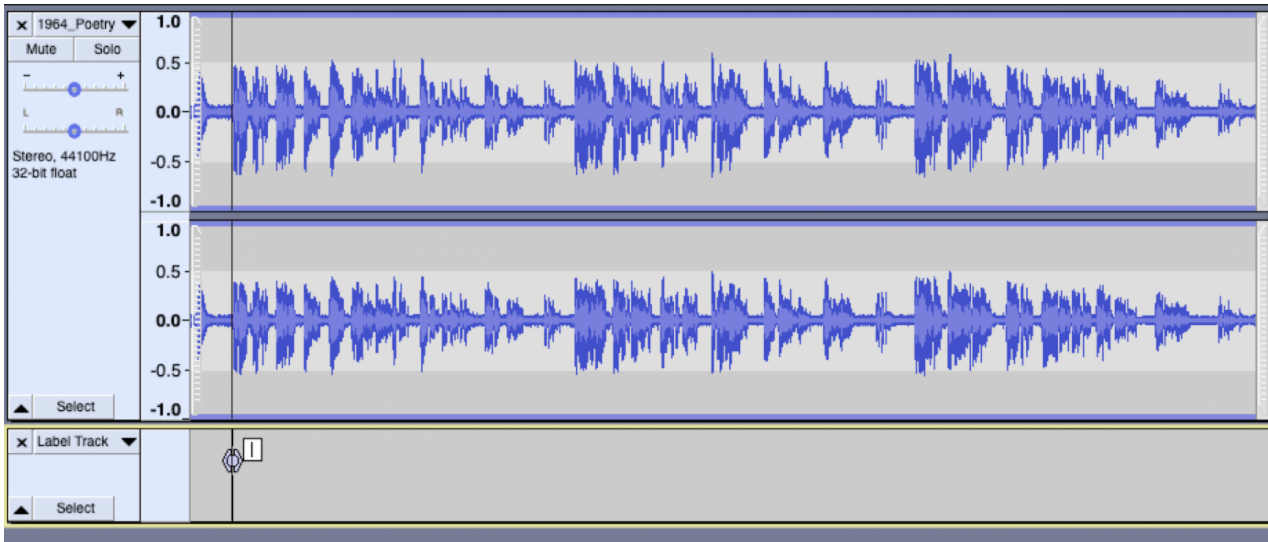
- We’ll use the “Label Track” to add annotations. Select “Tracks,” then “Add New,” then select “Label Track.”
- To insert a label at a point in time, you’ll pause the poem by selecting the “p” key, or pressing the pause symbol in the upper left, at the place you want to add a label.
- Select the time marker line to mark the place in time where you want to add the label. This typically will correspond to the place where you paused the audio.
- Then, you’ll select command + b (the shortcut for Edit → Label → Add Label at Selection) to add a label on the label track. A field will pop up, and you can type your annotation. (Example: You may add “Stanza1” to mark the first stanza of a poem.) You could leave the point annotation as it is, or create an annotation as a range with a starting and an ending point.
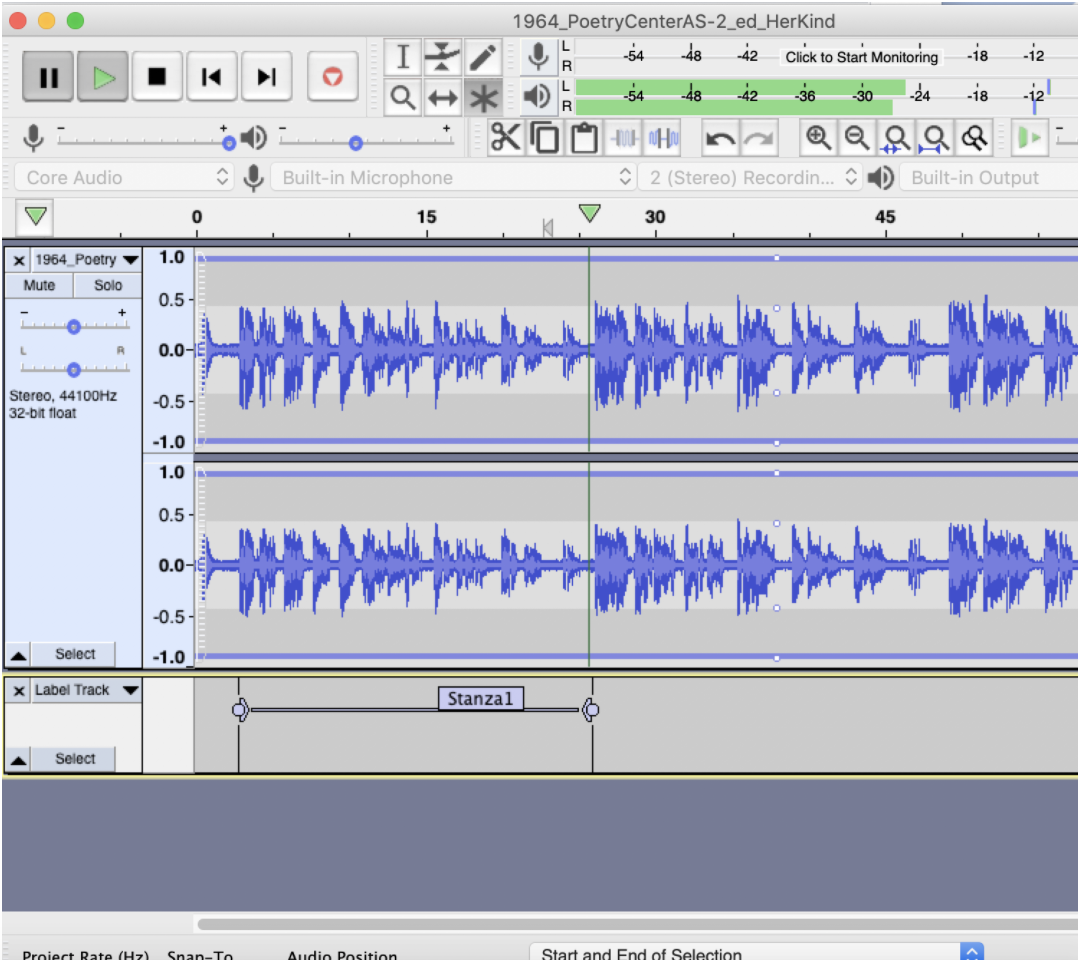
- To create a range, you’ll select and drag the right edge of the point marker in the label track to the end of the moment you would like to annotate. You’ll have to play the recording to know where to end your range. A completed range will look like this:
- You can also add multiple label tracks to organize your annotations as you work. To do so, navigate to Tracks → Add New → Label Track.
Annotating in Audacity (Method 2)
- When you open the app and add audio, navigate to Edit → Labels, then select “Type to create a label.”
- This creates a shortcut to add a label when any key is pressed. Now as you’re listening, when you type any key, a label will begin, allowing you to add labels without pausing. (Note: This will only add point-in-time labels, not ranges.) Using this method, to pause the audio, you need to use the pause button on the upper left of the interface (the “p” shortcut will not work).
Exporting labels from Audacity
- Go to File → Export → Export Labels.
- Name your labels and save as a .txt file. You will need this file when creating your project with the AudiAnnotate application.
Creating Annotations Using a Spreadsheet
You can use spreadsheet programs (like Excel or Google sheets) that export .tsv files to create and organize annotations for AudiAnnotate. To do so:
-
Create a blank spreadsheet. Note: Each .tsv file is one annotation layer in AudiAnnotate. If you have multiple annotation layers, you will need multiple files of annotations.
-
AudiAnnotate accepts annotations formatted with three tab-separated columns.
- The first column should contain the beginning time (in total seconds) of the annotations.
- The second column should contain the end time (in total seconds) of the annotation (if necessary).
- The third column should contain the contents of your annotation. These annotations can be either point or range annotations.
- A point annotation references one point in the audio. Its beginning and end times are the same. (You may also input just one time value.) An example point annotation looks like:
| 3 | 3 | bpNichol says “urnspits” |
| 3 | 3 | bpNichol says “urnspits” |
- A range annotation has different start and end time values, referencing a range of time in the audio. An example range annotation looks like:
| 0 | 2 | bpNichol talking sensically |
3. Enter your annotation(s) into the sheet(s) as necessary. You may find a template spreadsheet with explanations for creating properly formatted annotations using Google Sheets here, or for a spreadsheet with a different format, here. It will prompt you to make a copy of the template for your own use.
4. Once you have completed your annotations, download each annotation layer as one .tsv file to upload into AudiAnnotate.
Creating Annotations Using Adobe Premiere
- Before creating annotations in Adobe Premiere for your AudiAnnotate video, you will need to create a new project in Adobe Premiere and title the project. Select“New Project…” on the left-hand opening menu of Premiere when prompted.
- List a title for your project under “Name” and select “Ok.”
- Once you have done so you can import a .mp4 file by selecting “File” then selecting “Import…” and selecting your downloaded .mp4 to import into Adobe Premiere from your files.
- Double click the still from the .mp4 video in the bottom left hand corner of the screen to put the clip into the timeline for annotating. Once the .mp4 is visible in the timeline, Adobe Premiere should look like this:

Annotating Videos in Adobe Premiere Using Markers
- Annotations are added using the “Marker” feature. To add a marker, select the play icon on the timeline to begin the video. Pause the video then select “Marker,”then “Add Marker” where you want to begin annotating. This will drop a marker at that point.
- Once you have dropped a marker, select “Edit Marker” from the drop down menu.
- The Marker “Name” should be the name of each layer you ultimately want in your AudiAnnotate project. The Marker “Comments” should be the text of annotation itself, such as a transcription.
- You can also add a duration by clicking and holding the blue timecode (above the marker) and dragging it to the right. You can drag the second marker to the end of the clip to annotate a range instead of a point in time.
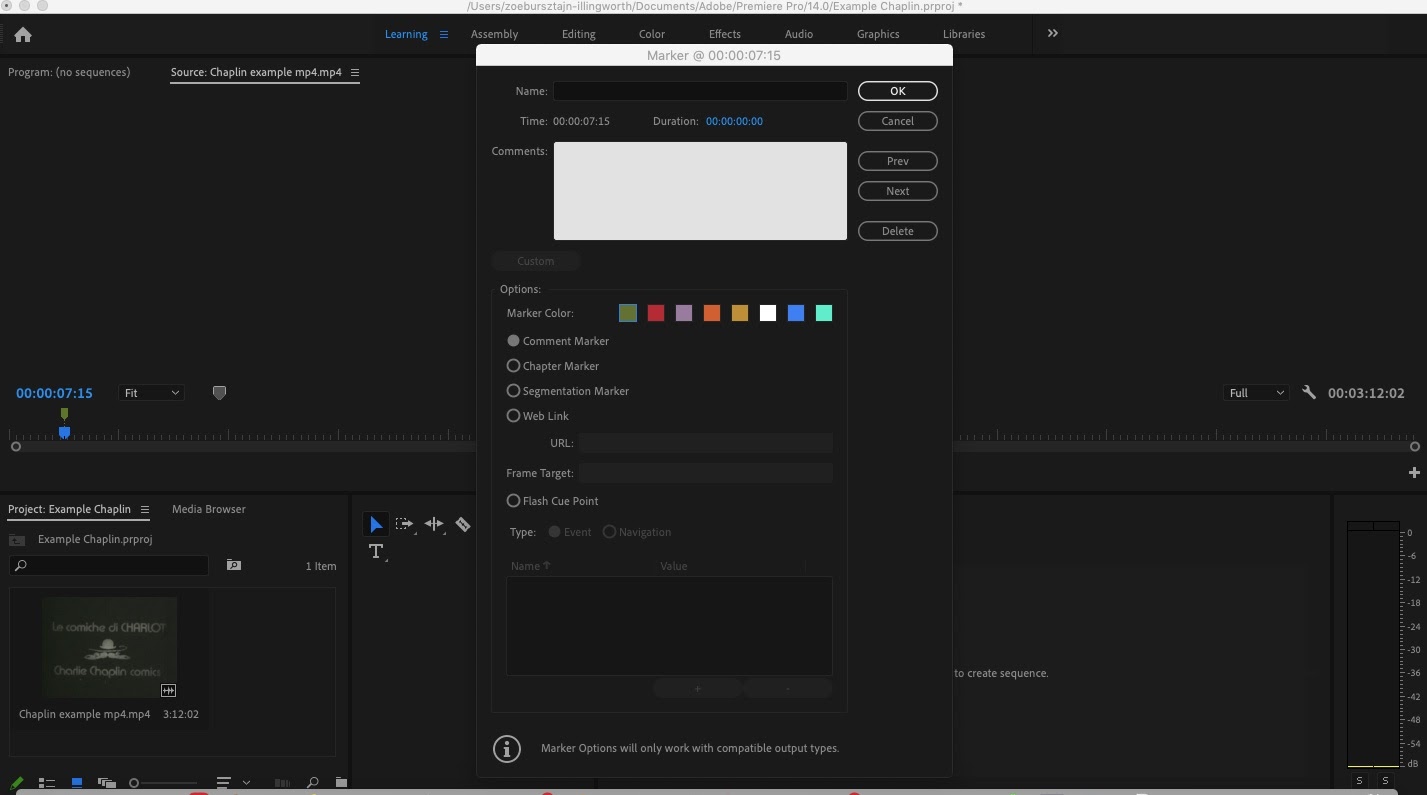
- Continue adding markers with names for each layer and your annotations under “Comments.” It may help your organization to use distinct colors for markers corresponding to each layer, but it is not necessary.
- Once you have finished annotating your video using markers, follow the instructions below to export your annotation file.
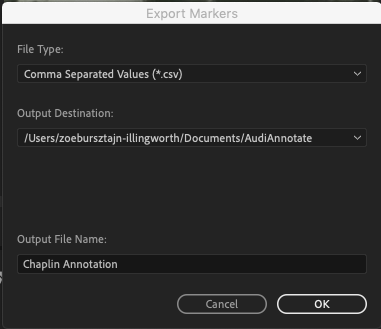
Exporting Your Annotations from Premiere:
- Select “File” then select “Export.”
- Under the options for “Export” select “Markers.”
- The default setting for a .csv file works for AudiAnnotate, so keep this export setting.
- You can rename the file as you wish and select a location for it, but do not edit the formatting of the file before uploading it to AudiAnnotate.
Creating a Publicly Available Link to an Audiovisual Item
AudiAnnotate supports direct links to:
- Audio: HTML: MP3, WAV, and OGG.
- Video: MP4, WebM, and Ogg
If you own an audio or video file that does not exist on the internet, you can upload your materials to the Internet Archive or Wasabi and retrieve a link:
Uploading a File to the Internet Archive
- Select the upload button at the top right corner of your screen.
- Select the “Upload Files” button.
- Select your desired file and select the “Open” button.
- Fill in the required fields of the metadata box and select the “Upload and Create Your Item” button.
Retrieving a file link from Internet Archive
- On the details page of your desired file, navigate to the “VBR MP3” download option and select the link.
- The link in your browser’s search bar can be used in AudiAnnotate.
Uploading a file to Wasabi
(Wasabi is a paid cloud storage service. Public files can only be created through a paid subscription to Wasabi and are not supported through their free trial.)
1. Create an account on Wasabi following the instruction and log in.
2. Select “Buckets” on the left hand column.
3. Select “Create Bucket.” This is a unique name across the Wasabi system.
4. Select a storage region, then select “Create Bucket.”
5. On the dashboard, select the bucket you just created.
6. Select “upload file” or drag and drop the .mp3 file to upload.
7. Click “start upload.”
Retrieving a file link from Wasabi
1. Once the file has uploaded, exit out of the upload screen, then click the file name.
2. A menu will appear to the right.
3. To create a working link, click the “Make file public.”
4. You can now copy the link under “Link to file” to use on AudiAnnotate.
Adding Introductory Text to an AudiAnnotate Project
AudiAnnotate projects support introductory material on the project page and on pages for each audiovisual item. To add introductory text, follow the steps below.
Adding introductory material to a project page
- Navigate to the AudiAnnotate Application.
- After signing in, select the blue “edit” button on your project tile.
- On the “My Projects” page, you will see text that says “You can add introductory material by modifying index.markdown.” Select the linked text. This will take you to the index.md file for your project in your GitHub repository.
- To modify introductory material, add information below the dashed line.
- To publish changes, select the green “Commit Changes” at the bottom of the page.
Adding introductory material to an audiovisual item page
- Navigate to the AudiAnnotate Application.
- After signing in, select the blue “Edit” button on your project tile.
- On the “My Projects” page, select the linked audio item that you would like to add introductory material to.
- On the project page for your audiovisual item, you will see text that says “You can add introductory material by modifying [audio item].md.” Select the linked text. This will take you to the markdown file for your project’s audiovisual item in your GitHub repository.
- To modify introductory material, add information below the dashed line.
- To publish changes, select the green “Commit Changes” at the bottom of the page.